
Guide To Concrete Slab Foundations for Your Building Project
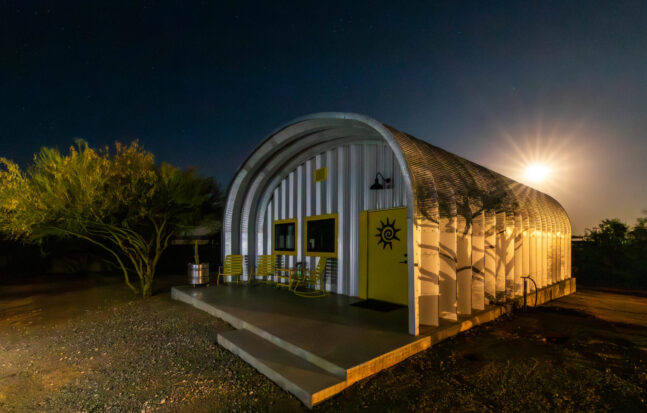
Every building, whether it’s a Quonset or a skyscraper, needs a solid foundation. For most building projects, that foundation is a concrete slab. It’s reliable, cost-effective, and a time-tested approach to providing your structure a strong base to build upon.
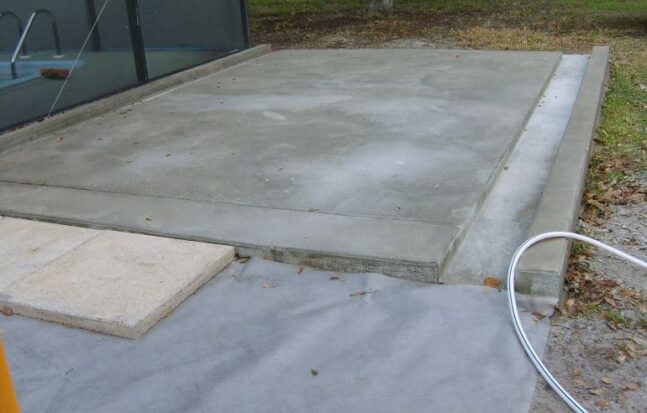
What Is a Concrete Slab Foundation?
A concrete slab foundation is what it sounds like: a flat, horizontal pad of poured concrete sitting on the ground, and it serves as both the structural base and the floor of a building. Typically ranging from 4 to 6 inches thick for residential construction (and potentially thicker for larger commercial applications), the slab transfers the weight of the structure above it into the ground below.
When to Use a Slab Foundation
For many projects, a concrete slab is the most practical and economical choice. That said, the best foundation is always the one matching your specific site, climate, and building goals.
- Climate: Slab foundations perform best in climates where the ground doesn’t freeze deeply. In colder climates, slabs can be used, but the footing depth must account for the frost line (the lowest level below the ground surface to which a temperature of 32 F extends), which increases cost and complexity.
- Soil type: Slabs work well over dense, well-compacted soils, preventing shifting under building loads. Sandy or clay-heavy soils may require extra preparation and reinforcement, but they’re not deal-breakers; rather, it means a bit more planning upfront is needed.
Project Types Best Suited for Slab Foundations
Slabs are versatile. You’ll find them under:
- Single-family homes, especially ranch-style and one-story construction
- Garages, workshops, and sheds, where a clean, level floor is essential
- Accessory dwelling units (ADUs) and backyard studios
- Commercial buildings like retail shops, warehouses, and office spaces
- Agricultural and storage structures are ideal for the storage of heavy or large items
If your building sits at or near grade level and doesn’t require access to a basement or crawl space, a slab is almost always worth considering.
What This Guide Covers
This guide is meant to provide everything you need to understand about concrete slab foundations, including:
- Types of slab foundations
- Slab site planning
- Quonset considerations
- Steps in site prep
- Pouring process
- Curing the slab
What are the most popular concrete slab foundations?
Not all slabs are built the same way. The type you use depends on your soil conditions, building type, climate, and budget. Here’s a breakdown of the four most common slab types so you can have an informed conversation with your contractor or make a confident decision on your own.
Monolithic Slab
What it is: A monolithic slab is poured in a single continuous pour, the footings, edges, and floor all at once. The perimeter is thickened to create integrated footings, but no separate footing forms are needed.
When and why it’s used: This is the most common slab type for residential construction in mild climates, and it’s popular for practical reasons: it’s fast, cost-effective, and eliminates the need for separate footing work. Because everything is poured together, the labor and material costs are lower, and the construction timeline is shorter.
Stem Wall Slab (Raised Perimeter Slab)
What it is: In a stem wall design, the foundation consists of two separate pours.
First, a perimeter footing is poured below grade. Then, a concrete block or poured concrete “stem wall” is built on top of the footing.
Finally, the interior slab is poured independently within the perimeter.
When and why it’s used: Stem wall slabs shine in areas with deeper frost lines, sloped terrain, or poor surface soils. Because the footings are placed below the frost line, the foundation won’t heave or move as ground temperatures fluctuate. They’re also the right choice when the building site has grade changes, since the stem wall can be adjusted in height to create a level platform. Yes, they cost more and take longer than a monolithic slab, but in the right conditions, they’re worth every penny because they last.
Slab Site Planning Needed
Good site prep and planning before the pour make everything easier and reduce the likelihood of costly surprises. Here’s what to address during the planning phase. For greater detail, check out our site prep planning guide.

Soil Evaluation
Not all soil is created equal, and understanding what you’re building on is fundamental to choosing the right slab type and design. Determining whether your soil is fit for a foundation depends on the scale of the build, moving from simple visual checks for homes to rigorous scientific analysis for commercial sites. For most residential projects on stable, sandy, or gravelly ground, a visual inspection paired with knowledge of neighboring structures can be enough to proceed with a standard slab; however, if the soil is dark, organic, or holds water like a sponge, a professional consultation or a hand-penetrometer test is a necessary safeguard.
In contrast, commercial projects almost always mandate a formal geotechnical investigation where a licensed engineer uses test borings and laboratory analysis to dictate the final structural design. While this formal process is more involved and required for permits, it is a well-established step that your engineer and contractor will handle to ensure the building stays where you put it.
Grading and Drainage Planning
Water accumulating around and under a slab is concrete’s worst enemy. Proper grading ensures that surface water flows away from the building, not toward it.
At a minimum, the finish grade around the slab perimeter should slope away from the building at a rate of at least 6 inches over the first 10 feet. This is known as positive drainage, and it’s one of the most effective and least expensive things you can do to protect your foundation over the long haul. Check with your local grading ordinances before moving soil around, as many municipalities have rules about where you can direct stormwater runoff.
Permits and Code Requirements
For every permanent structure, you’ll almost certainly need a building permit. Permit requirements vary by municipality, but for slab foundations, you can generally expect:
- A site plan showing the building’s location and setbacks from property lines
- A foundation plan detailing slab dimensions, thickness, reinforcement, and footing design
- Inspections at key stages (typically before the pour and after framing)
Ideally, you can work with a prefab building company that provides you with designs and plans for the slab. This makes it easy to plan and be more effective in acquiring permits.
Don’t skip the permit process. Beyond the legal and safety reasons, an unpermitted structure can create serious headaches when you sell the property or file an insurance claim. Most local building departments are more approachable than people expect, and the permit process gives you the benefit of a second set of expert eyes on your plans.
Utility Rough-Ins Before the Pour
If your building will have plumbing or electrical, those pipes or wiring need to be roughed in before the slab is poured. Once the concrete is down, accessing under-slab utilities means cutting and breaking through it, which is expensive and disruptive. Walk through your building plan carefully with your plumber and electrician before scheduling the pour. A few extra hours spent on pre-pour coordination can save days of headache later.
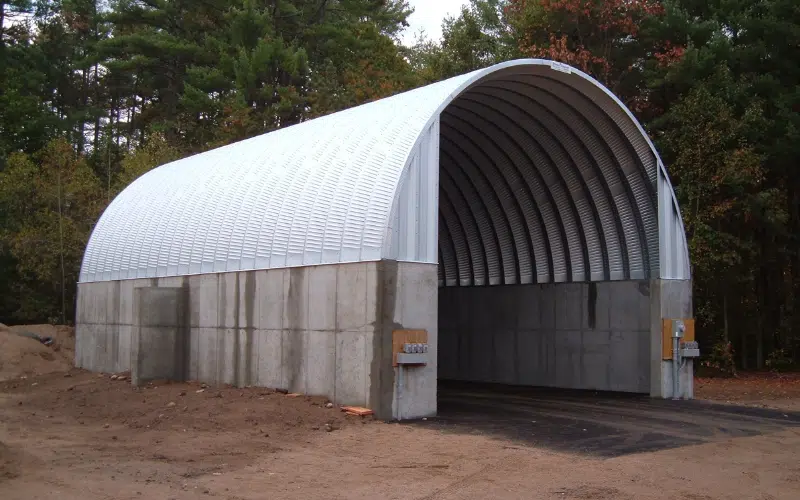
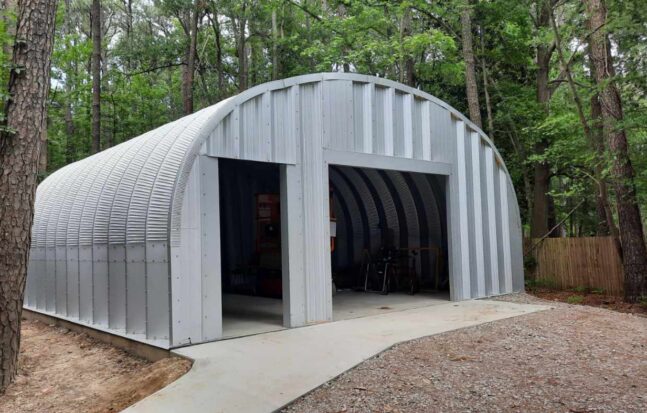
Quonset-Specific Concrete Slab Foundation To Be Arch-Ready
While a standard slab works for a standard building, depending on its size and model, Quonset huts may require alternative designs. Its arch shape creates outward thrust at the base of the arches. In simple terms, gravity pushes down on the arch and forces the bottom of the walls outward.
If the foundation isn’t designed to restrain the outward force, the structure can spread, leading to misalignment or loss of structural integrity.
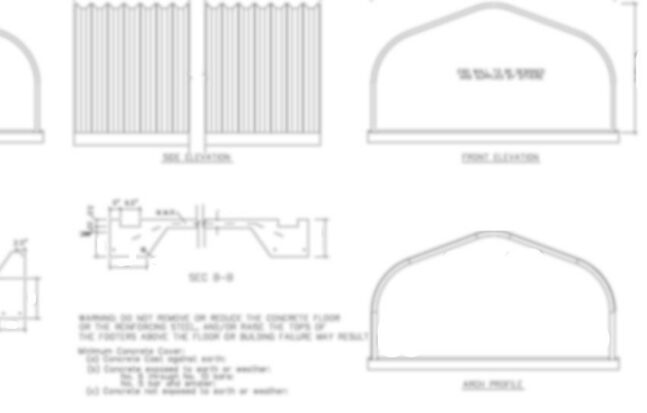
Engineered Plans Are Non-Negotiable
Reputable Quonset manufacturers provide engineered foundation drawings tailored to the building’s size and load requirements.
These plans specify:
- Footing dimensions
- Rebar size and spacing (e.g., if needed, #5 rebar at 12″ intervals)
- Anchor systems
- Include a licensed engineer’s stamp
It’s critical to follow the plans exactly. These plans are calculated based on the specific “arch-stress” of your building size. Substituting materials or not following the plans can compromise the entire building system.
The Thickened Edge (Footing)
For a Quonset, the perimeter of your slab cannot be the same 4-inch thickness as the center; you will need a thickened edge footing. This extra concrete acts as an anchor, providing the weight and structural integrity needed to resist the building’s desire to splay outward under snow loads or high winds.
This thickened edge:
- Anchors the structure
- Resists outward thrust from the arches
- Provides additional strength against snow and wind loads
Note: Exact dimensions should always follow engineered plans, as loads vary significantly by location and building size.
Trough vs. Base Plate Mounting
There are two primary methods for attaching a Quonset hut to a concrete foundation, and each impacts how the slab is formed:
Trough System
A continuous channel is formed around the slab perimeter.
The arch panels are set into this recess and then grouted to lock them in place.
- Creates a strong mechanical bond
- Helps improve weather sealing
- Common in traditional Quonset designs
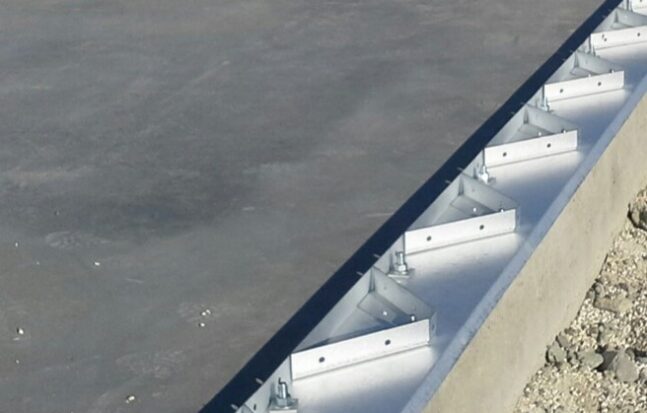
Base Plate (Curb) System
The arches sit on a flat slab or raised curb and are anchored using bolts through base plates.
- Faster installation
- Anchor bolted into the foundation
- More common in modern prefabricated kits
Precision Is Critical
If your slab is 2 inches off-square for most small-scale buildings, you can cheat in the framing to fix it. You cannot do this with a Quonset. The steel arches are pre-punched and rigid. If your concrete foundation isn’t square and level, the holes in the arches may not line up, and you’ll find yourself fighting a losing battle with thousands of bolts.
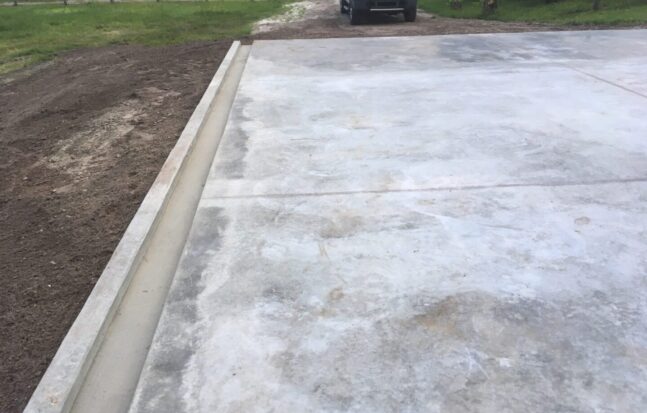
Managing the Drip Line
Because of the curved walls, rainwater runs directly down the structure and meets the slab at the base.
Because Quonset walls are curved, rain runs straight down the side and hits the foundation. So a perfectly flat slab without an edge designed to carry the water away isn’t ideal.
Without proper detailing:
- Water can pool along the perimeter
- Moisture can migrate inside without proper sealing
- Corrosion risk increases over time
To prevent this, include:
- A slight slab slope (“wash”) away from the building
- A beveled edge or curb detail
- Proper drainage planning around the perimeter
- Use a base plate system with a drip edge
Key Steps for Concrete Slab Foundation Planning
A concrete slab might look like a simple pad of gray material, but there’s quite a bit of engineering packed into its layers. Each component plays a specific role, and together they determine how the slab performs over time.
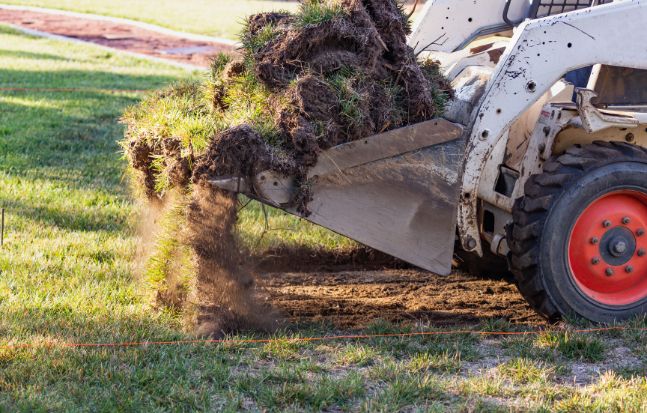
Step 1: Ground Prep
The subgrade is the native soil on which the slab system is built. Before the process can begin in earnest, the subgrade must be graded to the correct elevation and compacted to a uniform density. Loose or inconsistently compacted soil is one of the leading causes of slab settlement and cracking.
On top of the compacted subgrade goes a layer of crushed stone or gravel, typically 4 to 6 inches thick. This base layer serves two important functions. First, it provides a stable, well-drained working surface on which to pour the slab. Second, it helps break the capillary rise of moisture from the soil, so water cannot wick upward through loose aggregate the way it can through fine soil particles.
Step 2: Setting Forms and Establishing Grade
To form the slab, a lumber perimeter using (2×4 or 2×6 planks) acts as a mold to contain the concrete and define the slab’s edges. Forms must be:
- Set to the correct finished elevation using a level or laser level
- Staked to the ground so they don’t move under the weight of wet concrete
- Braced at corners and at regular intervals along long runs
- Treated with a form-release agent (such as a vegetable-oil-based spray or a commercial release agent) so they can be stripped cleanly after the pour
Take your time getting the forms level and square, as this determines the flatness and shape of the finished slab.
Step 3: Add Vapor Barrier For Moisture Control
Over the gravel base and beneath the concrete goes a polyethylene vapor barrier (about 6-mil or 10-mil thick). Its job is to block moisture vapor from migrating up through the slab, which can cause significant problems:
- Flooring adhesives fail
- Flooring buckles
- Mold can develop beneath floor finishes.
The vapor barrier should be lapped at seams (around 6 inches), taped where possible, and carefully protected from punctures during the pour. It should be turned up at the edges and trimmed flush after the slab cures. This is an inexpensive component with an outsized impact on long-term performance.
Step 4: Add Rebar, Wire Mesh, and Post-Tension Cables For Reinforcement
Concrete is strong in compression but relatively weak in tension. Reinforcement adds tensile strength, helping the slab resist the forces that cause cracking. With forms in place and the vapor barrier down, reinforcement is set according to the design plan.
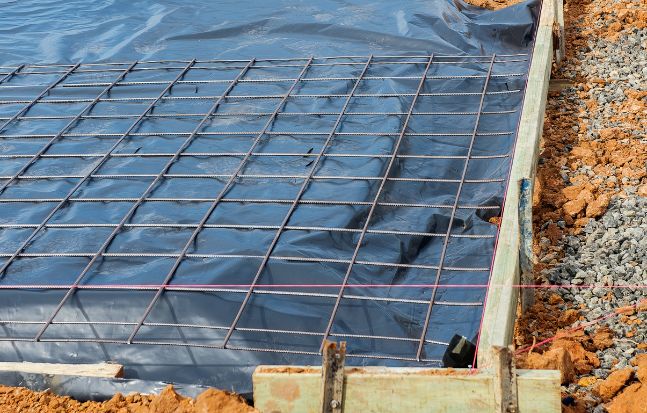
- Rebar (Reinforcing Bar): #3 or #4 rebar placed in a grid pattern (typically 18″ to 24″ on center) is the standard for residential slabs. Rebar is placed in the middle third of the slab thickness for maximum effectiveness and supported off the vapor barrier with plastic chairs to maintain proper cover.
- Wire Mesh (Welded Wire Fabric): A lighter, less expensive alternative to rebar, wire mesh is used in thin slabs and light-duty pours like patios and sidewalks. It provides crack control but less structural strength than rebar. Similar to rebar, mesh works best when it’s slightly lifted off the ground using small supports (called chairs), rather than lying directly on the vapor barrier.
Step 5: Ordering Your Concrete
Concrete is ordered from a ready-mix supplier by the cubic yard. SteelMaster will provide drawings for you to give to your concrete company, and they will calculate your volume carefully: length × width × thickness (in feet), divided by 27.
The Pouring Process Step by Step
Pour day is when months of planning come together in a matter of hours. It’s a fast-moving, physically demanding process, so be ready to work if you’re a DIYer. Here’s how it unfolds.
Step 1: Pouring Concrete
On pour day, the truck backs up to the site and deposits the concrete either from the chute or via a concrete pump (for larger pours or difficult-to-reach areas). The concrete is moved into place with rakes, come-alongs, or vibrating screeds, taking care not to segregate the mix by dragging it too far. Work in sections, keeping a wet edge to prevent cold joints.
A concrete vibrator should be used to consolidate the mix around reinforcement and remove air pockets, particularly near the edges and in thicker footing areas.
Quonset huts are unique because they don’t sit on the slab; they are often bolted into a trough or U-channel or require specific anchor bolt patterns, differing from a standard slab.
Step 2: Screeding, Floating, and Finishing the Surface
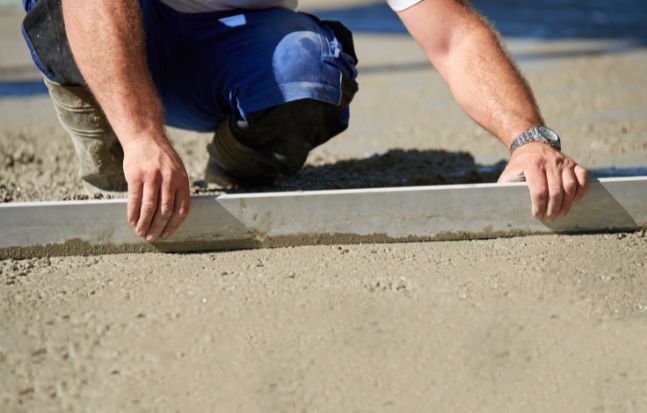
Once the slab is filled to grade, the surface is struck off with a screed board (a long, straight board pulled across the top of the forms to remove excess concrete and establish a flat, level surface).
After screeding, the concrete is floated with a bull float (a large, flat tool on a long handle) to embed aggregate below the surface and close voids left by screeding. This is followed by finishing work done on hands and knees with hand floats and trowels as the concrete stiffens.
Timing is everything. Work the surface too early, and you’ll bring water and cement fines to the top, weakening the wear surface. Wait too long, and the concrete becomes unworkable. Watch for the bleed water to evaporate and the surface to lose its sheen; that’s your window.
For interior slabs, a smooth steel trowel finish is standard. For exterior pads and driveways, a broom finish adds slip resistance.
Step 3: Add Control Joints
Concrete shrinks as it cures, and shrinkage causes tension. If the slab can’t relieve tension in a controlled way, it will crack on its own in unpredictable or undesirable locations. Control joints are planned weak points cut or tooled into the slab surface that tell the concrete where to crack.
Control joints should be cut to a depth of at least one-quarter of the slab thickness, within 4 to 12 hours of the pour (for saw-cut joints) or tooled in while the concrete isl workable. Spacing is typically 10 to 15 feet in each direction for a 4-inch slab. A good rule of thumb is joint spacing (in feet) equal to 2 to 3 times the slab thickness (in inches).
Curing the Slab
Curing is one of the most underappreciated steps in slab construction, yet it’s one of the most impactful. Proper curing keeps the right amount of moisture in the slab long enough to create the strongest and most durable slab possible.
How Long Does Curing Take?
Concrete reaches about 70% of its design strength in 7 days, and close to full strength at 28 days. This doesn’t mean you have to actively manage curing for the full 28 days, but the first 7 days are critical. Keep the slab moist and protected during this period, and you’ll be rewarded with concrete performing as designed.
Curing Methods
Several approaches work well, and the right one depends on your climate, project size, and available resources.
- Wet Curing (Moist Curing): Keeping the slab wet by spraying it with water or covering it with wet burlap is the most effective curing method.
- Curing Compounds: Spray-applied curing compounds are the most common approach for residential and commercial projects.
- Insulated Blankets: Insulated curing blankets trap heat and moisture, protecting the slab (keeping it above 50°F) in cold conditions. In hot, dry, or windy weather, they also prevent rapid surface drying.
Common Curing Mistakes to Avoid
- Letting the slab dry out too fast. Wind, low humidity, and high temperatures all accelerate moisture loss.
- Applying a curing compound over standing bleed water. Wait for the bleed water to evaporate before applying the compound.
- Walking or loading the slab too soon. Light foot traffic is acceptable after 24 hours, but don’t load the slab with heavy equipment or materials until it has reached sufficient strength.
- Pouring in extreme temperatures. Avoid pouring when temperatures are below 40°F or above 90°F unless you have a specific cold-weather or hot-weather concrete plan in place.
Top 3 Takeaways
Building a concrete slab foundation is one of those tasks that looks more intimidating from the outside than it is once you understand the process. Like most things in construction, it rewards preparation, attention to detail, and a willingness to do each step correctly rather than fast.
The key decision points to carry with you
- Match your slab type to your soil conditions and climate; the right slab design is the foundation of everything else.
- Decide whether to DIY or hire out based on project size and your skill level. There’s no shame in either direction.
- Invest in subgrade preparation. No slab can outperform the soil it sits on.
- Don’t skip the vapor barrier, the control joints, or the curing. These steps cost little but protect enormously.
- Understand the costs before you start, and plan for a contingency of 10 to 15% to cover surprises.
Work with local professionals
Your local building department, ready-mix concrete supplier, and a licensed contractor or structural engineer familiar with your region’s soils and climate are invaluable resources. The advice of someone who has built hundreds of slabs in your area is worth more than a general guide, including this one.
Your next steps
Review your site conditions, sketch out a plan, pull a permit, and start getting bids. You’ve got everything you need to move forward with confidence. The most important pour is the one that gets done right, and now you know how to make sure yours does.