
Practical Site Prep Guide: From Simple Sheds To Custom Homes To Commercial Projects
Site preparation is an essential phase of any construction project, even for prefab buildings, to ensure the long-term integrity and viability of a building. Generally speaking, it means creating a flat, dry, and stable place for your building to sit while getting the legal, engineering, and logistical groundwork done before materials arrive.
Why does it matter? A site that isn’t level, poorly drained, or built on the wrong type of soil can cause several problems for the building’s foundation and structural integrity. Addressing these problems after construction is far more expensive than preventing them before it begins with proper site prep.
The good news: not every project requires the same level of preparation. A basic shed for storage has very different requirements from a custom home or a commercial building project. This guide helps you understand each step in the process and scale the effort and cost to fit your actual project.
What you’ll learn:
- Quick-Start Guide
- Step-by-step Site Prep
- Site Surveying & Layout
- Soil Testing & Analysis
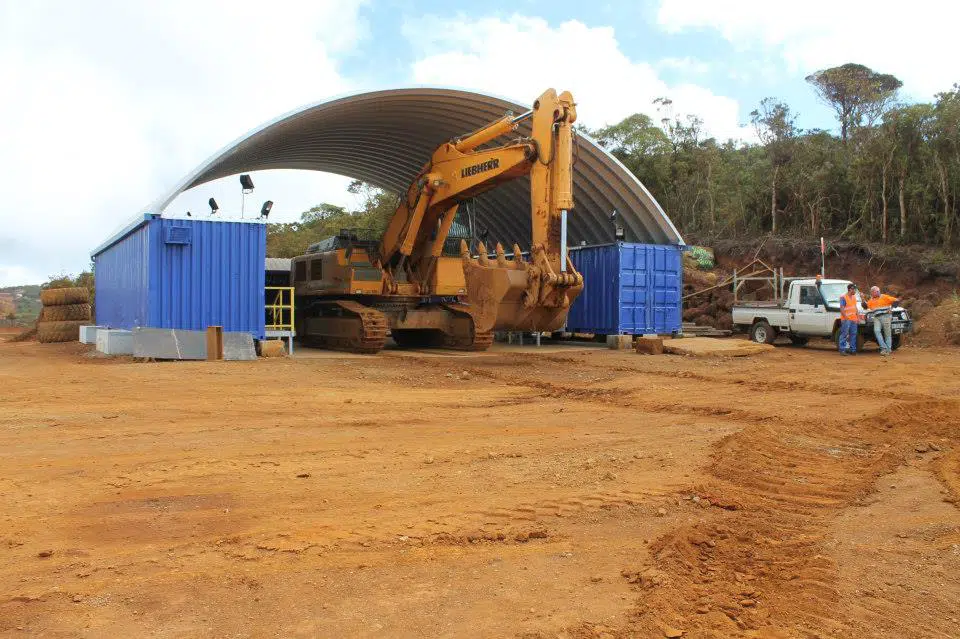
- Site Clearing
- Site Plan/Design
- Grading & Compaction
- Run the Lines (if applicable)
- Finish the Edges
- How Much Site Prep Do You Need?
- Safety Considerations During Site Prep
- Rough Cost Reference
- Common Site Prep Mistakes
- Do I Need To Prep My Build Site?
Who’s typically involved in site prep?
- Property owner (always)
- Licensed land surveyor (in some cases)
- Geotechnical (soils) engineer (in some cases)
- Site prep contractor for excavation, grading, and compaction (in some cases)
- Licensed utility contractors (in most cases)
Quick-Start Site-Prep Guide
By following a systematic approach to site prep, you can avoid costly delays and ensure a safe, efficient building environment. At a glance, it’s a simple 6-step process that may or may not apply to your project depending on the scale and use of your building.
- Site Surveying & Layout: Decide where the building goes and confirm it clears your property lines, setbacks, and any buried utilities.
- Soil Testing & Analysis: Determine whether the soil drains well and is firm enough to hold the weight of your structure.
- Site Clearing: Remove all grass, roots, and organic material until you reach solid, stable ground.
- Site Plan/Design: Create a drawing of the site outlining key features of the building and property.
- Grading & Compaction: Build a compacted pad of structural fill that is flat, slightly oversized, and properly drained.
- Run the Lines (if applicable): Plan where your water, power, and sewer connections will come from—and get cost estimates before you start.
- Finish the Edges: After the building is up, complete any final grading around the structure for drainage, paving, or landscaping.
Timeframe:
- Small projects (sheds, outbuildings): a few days of actual work.
- Rural projects (ag storage, barns): a few days or weeks of actual work
- Larger structures (homes, commercial buildings): 1–2 months total, including time to obtain permits.
Step-by-Step Breakdown
Each step below is scaled to project size. The “Simplified Route” covers what is typically appropriate for smaller outbuildings. The “Pro Route” reflects what is required or strongly recommended for a primary home or commercial build.
Step 1: Site Surveying & Layout
Confirm that you are building in the right place, not on a neighbor’s property, not over a buried utility line, and not in violation of local setback requirements. Taking a moment to verify these basics ensures your project starts on solid (and legal) ground.
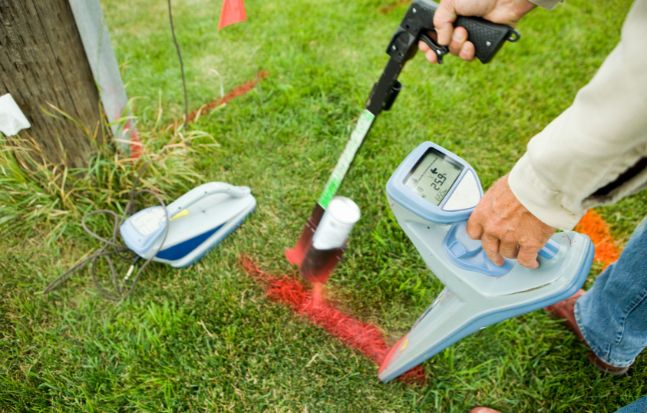
Before You Do Anything: Call 811
In the United States, call 811 before digging anywhere on your property. This free service dispatches locators to mark underground utility lines within a few business days. This is not an optional step; striking a buried gas or power line is dangerous and costly.
The Simplified Route
For a small outbuilding on a large rural parcel with clear boundaries, you may be able to use existing property pins and a quality tape measure to confirm setbacks yourself. However, even in rural counties, there may be local code that requires a property survey to be conducted.
The Pro Route
Hire a licensed professional land surveyor to establish your exact property corners and produce a legal survey. This is required in most jurisdictions for new home construction, additions on tight city lots, or any project that requires a building permit tied to a recorded plat. Costs typically range from $200 to $2,000, depending on location and complexity.
Key Questions To Ask At This Stage
- Is the lot large enough for the building with the required setbacks on all sides?
- Do any easements exist that affect where you can build?
- Are existing utility lines in conflict with the proposed footprint?
- Where will the plumbing and electrical system go, if applicable?
Step 2: Soil Testing & Analysis
Determine whether the ground will hold the weight of your building without shifting, settling, or absorbing water in ways that undermine the foundation. While this sounds technical, it is a standard, routine part of the process that DIYers and professionals handle every day with great success. With the right data in hand, these adjustments are typically straightforward and give you total peace of mind before the first brick is laid.

The Simplified Route
For a light outbuilding on well-drained land, a visual assessment is often sufficient. Look for two red flags: expansive clay (soil that cracks when dry and swells when wet) and areas that stay wet or swampy after rain.
If neighboring structures have stood stable for years on similar soil, you likely have workable ground.
When in doubt, a basic soil test is inexpensive insurance.
The Pro Route: Two Tests You May Need
Perc Test (Percolation Test): If your project includes a septic system, a perc test is required. It determines whether the soil drains water at a rate sufficient to support a septic field. A county health inspector is typically present to verify the test is conducted correctly.
Geotechnical Site Investigation: For a primary home, commercial building, or any structure with a significant foundation load, a geotechnical engineer analyzes the physical properties of the soil, identifies its load-bearing capacity, and flags problem soils such as expansive clays. The engineer’s recommendations directly inform how the foundation is designed. This step prevents the most common and expensive construction surprises—most construction problems trace back to unexpected ground conditions that a proper site investigation would have caught.
Important: If you are purchasing land
Have soil testing completed before closing on the property. Problem soils—expansive clays, high water tables, or fill material from previous grading—can make a site expensive or impractical to build on. This is much easier to discover before you own the land.
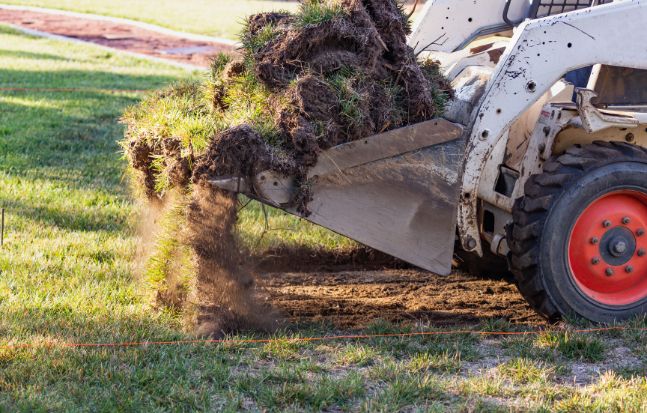
Step 3: Site Clearing
Strip away everything that does not belong under a building: trees, stumps, brush, existing debris, and, critically, topsoil and organic material. On properties that already have some level of landscaping, this will be easier than trying to build on undeveloped land.
Why Organic Material Must Be Removed
Topsoil is full of organic matter that continues to decompose underground. As it breaks down, it loses volume and creates soft spots.
If organic material is left beneath a pad or foundation, the building will settle unevenly over time.
This is not a problem you can fix after the fact without significant expense. Vegetation and root systems must be removed completely for the same reason.
What Gets Removed
- Trees, stumps, and root systems
- All vegetation and brush
- Existing debris or underground construction remnants
- Topsoil and organic-rich surface soil
The Simplified Route / DIY Option
For a small site, you can often rent a skid-steer (commonly called a Bobcat) for a weekend for a few hundred dollars and handle the clearing yourself. The work is physical but straightforward if the site is not heavily wooded.
The Pro Route
A site prep contractor uses bulldozers and excavators to clear and rough-grade the site. For larger projects, this work happens as part of a coordinated plan following surveying and soil analysis.
Step 4: Site Plan/Design
Produce a drawing, formal or informal, that shows where everything is located on the property so that permits can be obtained and construction can proceed in an organized way. Don’t let the paperwork intimidate you; whether it’s a professional blueprint or a clear sketch, getting your ideas on paper is a manageable task that serves as your project’s roadmap. Once this layout is set, the rest of the logistical pieces usually fall right into place.
What a Site Plan Includes
- Property boundaries
- Footprint and orientation of the proposed structure
- Distances from property lines and existing buildings
- Roads and access points
- Drainage features
- Location of utilities
- Pipes and septic system/sewer connection (if plumbing is included)
The Simplified Route
Most counties and rural jurisdictions will accept a neat, hand-drawn plot plan for small outbuildings, typically a scaled drawing showing your property lines and where the new structure sits in relation to the road, other buildings, and property boundaries. Check with your local planning or building department before assuming this is acceptable.
The Pro Route
An engineered or professionally drawn site plan is required for most building permits on primary residences and commercial projects. A licensed land surveyor or design professional prepares the plan. No excavation should begin until the site plan is approved and all permits are in hand.
Step 5: Grading & Compaction
Create a flat, hard, stable surface that can carry the weight of the building without shifting, cracking, or allowing water to pool underneath or around the structure. Achieving this solid foundation is a very common task and is often the most satisfying part of seeing the site transform. Once the ground is properly prepped, you’ve essentially cleared the biggest hurdle to a smooth and successful build.
The Numbers That Matter
Level tolerance: In most cases, for larger buildings, the finished pad should be no more than 2 inches off level across the entire footprint. This sounds like a small detail, but across 30 or 40 feet it has major consequences. Even modest deviations cause drainage problems, door misalignment, and uneven foundation settlement.
Pad size: It’s suggested to extend the pad beyond the building on each side, 1-2 feed for smaller buildings and at least 4 feet for larger buildings. For example, a 30×40 building requires a pad at least 38×48. This buffer gives crews room to work, reduces runoff problems during construction, and makes final grading easier afterward.
Fill Material: What to Use and What to Avoid
You can never build directly on topsoil or organic-rich ground. That material decomposes, loses volume, and creates soft spots. So there’s almost always some fill work involved, even on a seemingly flat, firm site. Additionally, if your site isn’t naturally flat, or if the cleared ground sits lower than it needs to for proper drainage, fill material is brought in to raise the surface to the right height. This is the most common scenario. After clearing topsoil and organic material, you’re often left with a low or uneven surface that needs to be built back up before compaction can create a usable pad.
Use clean, well-graded structural fill such as a clay-based soil or a clay-gravel mix. These materials compact tightly, resist moisture movement, and create a stable base.
Avoid topsoil, loose sandy soil, and organic material under or within the pad. These materials shift, retain moisture, and continue to compress under load. If existing soil on the site is unsuitable, it must be removed and replaced with approved fill. In some cases, previously excavated material from the same site can be reused if it meets compaction specifications.
The Simplified Route
If you’re building a shed or outbuilding and aren’t hiring a soils engineer, there are a few field indicators people use, none as reliable as a formal test, but useful as a sanity check:
- The rebar drop test: Drop a piece of rebar or a steel rod from waist height onto the compacted surface. If it penetrates more than an inch or so, the soil likely needs more work. If it bounces or barely marks the surface, you’re in reasonable shape.
- The probing test: Push a steel rod into the ground by hand. On well-compacted soil, you should not be able to push it in more than a few inches without significant effort.
- The footprint test: Walk across the finished pad. If your boots leave deep impressions or the ground feels spongy underfoot, compaction is insufficient. A properly compacted pad feels firm and shows little to no impression from foot traffic.
- Visual check after rain: if the pad develops soft spots, ruts, or pooling after a rain event, those areas likely weren’t compacted properly or have drainage issues pulling moisture in.
The Pro Route
On a permitted residential or commercial build, the geotechnical engineer or a third-party soils testing firm typically performs compaction testing and signs off on it before the foundation goes in.
If your project requires an engineered site plan, compaction verification is almost always part of that process.
Why Compaction Is Non-Negotiable
Improper compaction is one of the most common and most preventable causes of foundation failure. When soil is not packed tightly enough, the weight of the building compresses it over the following years. Concrete slabs crack, develop voids underneath, or belly outward.
These failures are expensive to repair and entirely preventable with proper compaction at the outset. Compaction must follow the soil engineer’s specifications and applicable building codes.
Step 6: Running Utilities to the Site
Get power, water, and sewer or septic service to the building before construction finishes and understand the cost before you start. While logistics and utility hookups can feel like a puzzle, they are standard procedures that utility companies and contractors handle as a matter of routine. Once you have your initial quotes and connections scheduled, the “heavy lifting” of coordination is largely behind you, and you can focus on the build itself.
The Key Rule: Get a Quote First
If your building is adjacent to an existing home or structure with active utility connections, extending service is usually straightforward and relatively inexpensive. If you are building 200 or 500 feet into an undeveloped parcel, utility line extension fees from the power company can become an expensive part of the project. Always obtain a written quote from the utility provider before finalizing your project budget.

What’s Required
- Identify existing power, water, and gas lines near the site before any trenching begins
- Licensed contractors are required to extend gas and electric service; permits are required
- If using an existing well, verify that the pump and pressure system can handle the additional load
- Coordinate septic placement with the site plan and the results of your perc test
Cost Realities
If no power currently reaches the property, utility extension typically costs between $10,000 and $30,000 or more, depending on distance from existing connections. Grid power that’s nearby a build site but not connected is substantially cheaper, typically costing between $1,500 and $5,000.
Step 7: Finish the Edges
Once the building is erected, complete any remaining grading work around the perimeter to direct drainage away from the structure and prepare the site for its final surface. This step is often overlooked during initial planning but is nonetheless essential. Final grading affects long-term drainage and the usability of the space around the building. Plan for it in both the schedule and the budget before the project begins.
The Simplified Route
In most cases, a 5% grade away from the building is suggested (about a 6-inch slope, 10 feet away from the building). A common formula used to calculate the proper slope is:
The Pro Route
Use heavy machinery to move soil around to create the correct grade/slope away from your building. Keep in mind, this should be accounted for before you begin construction.
How Much Site Prep Do You Need?
Not every project requires every step at full intensity. Use this table as a starting point, and always verify requirements with your local building department, since rules vary by jurisdiction or county.
| If You Are Building... | You Likely Need: | You Can Likely Skip: |
|---|---|---|
| A Garden Shed | Flat, level ground; 811 utility check before digging | Licensed surveyor, geotechnical reports, building permits (verify locally) |
| A Garage or Shop | Level compacted pad; good drainage; 811 utility check | Geotechnical report (unless soil is visibly soft or swampy) |
| A Primary Home or Commercial Project | Full licensed survey; perc test; engineered site plan; all permits | Nothing; do it completely by the book for safety and resale value |
Important note on permits:
Even if you believe a small structure does not require a permit, verify this with your local building or planning department before assuming. Permit requirements vary widely by jurisdiction, and building without a required permit can create legal and insurance complications when you sell the property.
Safety Considerations During Site Prep
Site preparation may involve heavy equipment, open excavations, and potential utility hazards. Before work begins:
- Call 811 to have underground utilities marked (required in the US before any digging)
- Review and update site safety protocols with everyone working on the project
- Ensure all crew members are trained on the equipment being used
- Select equipment appropriate to the scope and terrain of the project
- Monitor weather forecasts since grading and compaction work should not proceed on saturated or frozen ground
Common Site Prep Mistakes
Site preparation might not be the most glamorous part of construction, but skipping steps or cutting corners here tends to show up in expensive, frustrating ways later. Here are some of the most common mistakes to watch out for before you break ground.
- Never prep during or directly after a heavy rainstorm
- Never assume a flat yard is a level yard
- Don’t skip calling 811 because you’re “only digging a foot deep”
- Miscalculate how much material needs to be removed or brought in
- Rushing the process before the site is properly prepared and tested
Do I Need To Prep My Build Site?
Site preparation is not about making your project more complicated; it is about making it permanent. A little time and investment in the ground now prevents a much larger problem five years from now. So yes, you should always do some degree of site preparation before laying the foundation and construction begins.
The right level of prep depends entirely on what you are building. A garden shed needs flat ground and a utility check. A primary home needs licensed professionals, engineered plans, and documented permits. Everything in between sits on a sliding scale.
Start with the step that matches where you are in the process, ask the right questions of your local building department early, and get cost estimates from utility providers before you finalize your budget. The building itself is the exciting part—but the ground it sits on is what makes it last.